MS Paint! Many of us have heard of it, many of us have used it. For a long time it was the only graphics program most people could get their hands on, especially as kids. I've been using it for a long, long time, since I was sub-four at the earliest, and I've managed to pick up a few tips here and there, so I thought I'd share them with all of you!
Program Anatomy:
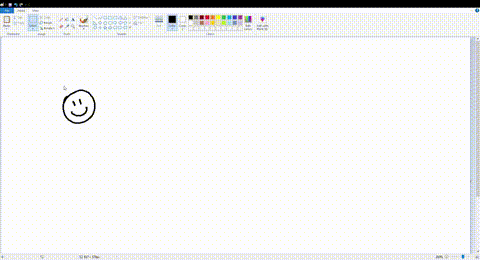
Let's start with some basics, for those who have never touched this program before. MS Paint, as simple as it is, is very similar in a lot of ways to most other art programs. You can probably figure it out on your own without too much difficulty, but I teach for a living so I prefer to air on the side of obsessive levels of detail. Here’s what we’re looking at!

Let’s go from left to right across the home menu first:
- Paste, Cut, and Copy: Self explanatory. I prefer the keystrokes, though.
- Area Selection: select a part of an image to move it around! In the drop-down menu, you can choose either a rectangle or free selection, which are each useful. Also in this menu is the ability to turn Transparent Selection on or off. If this is on, the background color (by default, white) will be transparent when you move it around. I tend to keep it on.
- Crop, Resize, and Rotate: Also pretty self-explanatory. Rotation is very limited, meaning you can only rotate images in increments of 90 degrees or flip them horizontally or vertically.
- Basic tools: From left to right, top to bottom, you have the pencil tool (for drawing), the fill-bucket tool (for coloring closed areas a solid color), the text tool (for writing), the eraser tool (for erasing), the eyedropper (for selecting a color from an image), and the magnifying glass (for zooming in or out).
- The Brush Tool: a very complicated menu, surprisingly! Brushes are like the pencil tool, but have different effects depending on which one you choose in the drop-down menu, such as partial transparency, textures, dithering, or (bad) anti-aliasing. They can be fun to try out! The only ones that I use a lot are the airbrush and marker brushes.
- The Shapes Menu: for making geometric shapes. You can change the color of the outline of the shape and the middle of the shape, as well as the type of brush each one uses (by default, the pencil, but you can make it interesting like using the marker or crayon brushes). Note that, in this menu, the outline of any shape you make will be the primary color, while the fill color of any shape will be the secondary color.
- Brush Size: a menu for adjusting the size of the currently-selected pencil, eraser, or brush tool.
- Primary Color: the color that your pencil tool or brush tool will draw with.
- Secondary Color: the color that the program considers the “background”. If transparent selection is on, anything this color will be transparent if you move it over something else! This also controls what color your eraser is.
- Color palette: A set of colors chosen for you, as well as a custom palette down on the bottom row. If you want to make new colors, you can do so under Edit Colors, at which point they’ll be added to the bottom row until another color overwrites them.
- And then there’s also the “Edit with Paint 3D” button but I’ve never touched that except by accident.
The next menu is the view menu, which I use mostly for zooming in and out (I find it easier than the magnification tool on the tools bar, but it’s up to you which one you like better!). You can also revert to 100% image size, fit the image to your screen, or turn on things like gridlines, rulers, or the status bar here.

There are also some important keystrokes to know to make drawing easier:
- Ctrl+Z, Ctrl+Y, Ctrl+V, Ctrl+C, Ctrl+X, and Ctrl+A: Undo, redo, copy selection, paste selection, delete selection, and select all, respectively. These are pretty standard.
- Ctrl+Numpad+ and Ctrl+Numpad-: make the pencil, eraser, or brush tools larger or smaller. Useful if the size menu is too limited!
Limitations:
Now that that’s out of the way, there are a few main differences that MS Paint has when compared to other programs. It’s good to be aware of them and how they might limit you while using it (or aid you, depending on what you're going for!), so let's go over those real quick.
- No Anti-Aliasing: Anti-aliasing is when your brush tool naturally feathers out around its edges, meaning that it blends in with the surrounding colors better. You can see what it looks like below, compared to a brush of the same size in MS Paint:

Since MS Paint doesn’t have this feature, Paint art is often defined by hard edges. Good for pixel art! But it can make some things like smooth shading harder. There are a few ways to get around this, which we'll go into later!
Something important to note here is that, because MS Paint really doesn’t know what to do with anti-aliasing, coloring in anti-aliased images tends to confuse it, giving you a gross ring of off-white around the inside of your colored selection. In summary, non MS-Paint art tends not to look good when edited in MS Paint!

- No Layer Feature: Exactly what it says on the tin: Paint doesn't have any sort of layering option, meaning that everything you draw has to be on one layer. No just turning off your sketch layer when you're done with it! This can also make coloring inside the lines (if you're going for a more painterly style) tougher, and means that you can't rely on filters or overlays when shading or finalizing a piece.
- No Free Rotate: Sadly, you can't rotate any images by anything other than 90 degree turns or vertical or horizontal flips. You drew that arm perfectly, but it would look better angled just a little further up? Sorry, man. No dice. This is probably the hardest to get around of the three, at least for me, since nothing Paint has can really mimic it (except for maybe the skew option, but that comes with its own problems). In any case, your best bet is probably to redraw it, or to plop it into another program (even Word or PowerPoint can do this, if you lack any other options) to rotate it there (but in that case, beware of that program anti-aliasing it for you!).
The Cool Stuff: Useful Tricks and Features!
Now, onto some interesting tool tips you might not know about! These are some of my favorites -- I use them all the time! They can even help you get over some of the humps mentioned earlier.
Shift + Dragging:
Some other art programs like Photoshop have the ability to make their own brushes. Paint sort of has something similar! In order to make use of this, you first draw any sort of shape (what you want your brush to look like). Then, by holding shift as you drag it around the screen, it will leave a trail of the shape behind, like a brush! This can be useful for textured shading. Here's what it looks like in practice:
A subset of this is also used for a "glitchy" effect in art, which is very hard to do in non-Paint programs! To do this, select a very jagged, scribbly area using the free select tool. Then, hold down shift while jiggling it around a little. I used it a lot in my Wolf PMV!

Right-Click Eraser Usage:
The right-click eraser trick is probably the single best way to get around Photoshop's lack of layering. I use this literally any time I draw on Paint! The gist of this trick is to set your primary color selection to what we’ll call Color B, and your secondary color selection to Color A. Now, when you right-click as you drag your eraser key over anything that’s the color of Color A (MAKING SURE that “transparent selection” is selected in the image menu!), Color A will turn to Color B! Here’s an example of it in action:

I use this most often with sketches, after I’m done drawing line art over them. I tend to sketch in red. If my primary color is red and my secondary color is white, when I use this trick, all of my sketches will turn white, disappearing against the white background! All that’s left will be your line art, making getting rid of the sketches easy.

Painting Inside the Lines:
It can often be hard to color or shade within the lines without the use of a layer feature. One of the best ways to get around this is to make the object you’re coloring/shading a solid color – something obnoxious you haven’t used elsewhere, like purple:

Then, select the entire object and copy it. It’s often best to paste this into another window, just to make sure that you don’t forget about it and loose it! Now, color or shade to your heart’s content. Don’t worry about it overflowing the lines!

Now, go up to the color menu and change your secondary color to the one you chose earlier (for me, that same purple). Making sure transparent selection is on, paste it into the image. The purple part should be transparent, meaning that the color and shading will only peek through where you want it to be! The lines and background, meanwhile, will sit on top. Here’s what it looks like!


The main downside of this is that you’re stuck having to do one color at a time. As long as you don’t have too many colors on one object or character, though, it’s a great method to use!
Sketching Over a Colored Image:
While tracing is generally frowned upon with art you're going to post (in fact, you should never post traced art unless given explicit permission from the person who drew it), it can be very useful for practicing, getting a sense for the shapes in a pose, or just having fun on your own time! Since Paint has no layer tool, it can seem impossible at first unless your image is all one color or you want to painstakingly erase every single pixel around your sketch. But fear not, there's an easier way! Buckle up, this is the most complicated thing I've gone over here and involves some funky exporting.
Firstly, copy your image from wherever it is so that you’re ready to paste it into your MS Paint window. For the sake of simplicity, I’m gonna use this picture of Morty.

Now, go to your shapes menu and select the rectangle option. Go to the “fill” menu and select “marker”, and change your secondary color to black. Now drag a rectangle across the entire image – it will darken the image! This will help the lines we're going to draw contrast against the background, which is important for later. It should look like this:

From here, trace over the picture as you like with the pencil tool, making sure that the color you’re drawing with is 100% pure white. Nothing else will work! If you make a mistake and need to erase part of your line, you can use a black eraser. Now you have:

Once that’s done, go up to Save As. Under “save as type”, click the drop down menu and select “monochrome bitmap”. Then click save (you may need to close your window and reopen it). Your drawing should now be mostly entirely black, except for the white lines that you sketched earlier.

Success! You now have a sketch on a solid-color background that’s easy to get rid of. For easiest removal, you can invert the colors to make the sketch black and the background white.

Other Minor Tricks:
- Altering Sizes of Images: We’ve established that you can make the size of the pencil or brush tool larger or smaller by using Ctrl+Numpad+ or Ctrl+Numpad-. Additionally, you can double/half the size of an image by using the same sets of buttons while the image is selected! Just make sure it's not touching the edge of your window or it'll get weirdly stretched.
- Getting Rid of One Color: There’s also another fun way to get rid of one color (ala Right-Click Eraser). First, select a region with the area select tool. Move it a bit – even a pixel or two to the left or right is fine. Then, without de-selecting the area, make the secondary color the color you want to get rid of. If you jiggle the selection around a little, the anything of the secondary color will disappear. Poof! This is useful for large selections where using the eraser would get annoying.
- Resize and Skew: I always forget about Paint's Resize and Skew options, but they are there! You can access them in the image menu. You can potentially use them to tweak the proportions, perspective, or angle of a sketch, but only in small quantities, as they tend to get very pixelated very quickly. Aside from that, I haven't found any huge use for them.
- Invert Colors: There’s a way to easily invert the colors of a selection. Just select any region with the selection tool and right-click on the selection. At the bottom of the menu that appears is the option “Invert Colors”. Easy-peasy!
The Art of Shading
Now, I know that a lot of people want their drawings to have beautiful shading! On the surface, it can seem tough to do that in MS Paint. Hard edges? No overlays? How am I supposed to shade with that? I can't even use gradients! There are ways to handle this, though. They might be a little tougher than in other programs, but they all have their own unique styles and feels that I think are beautiful! Let's go over five types of shading methods that can help your art look its best. That being said, we’re testing them on the lumpiest, worst-draw circle known to man, so keep an open mind.
Basic Cell Shading:
This is by far the simplest option. Cell shading is when you use a few colors and stick to them, creating hard lines between each section of shading. It’s the most-straightforward, and good for sprite work and more stylized or cartoony pieces. It looks a bit like this!

Cell Shading with Loads of Colors:
If you want the shading to look a little smoother than rough cell shading does, you can make it look nicer by just amping up the amount of transitional colors you’re using. Instead of three shades, use ten! It produces this effect.

Dithering with the Airbrush:
This option is for those who want to dither, but also care about their wrists. It makes use of Paint’s airbrush tool, which sort of “feathers” out around the edges. This method is much like cell shading at first – you choose a few shades and block them out, but then you blend them together with the dithering that the airbrush provides. Considering how messy this tends to be, using that “paint inside the lines trick” is pretty much required for this one – in fact, I’d recommend it for all dithering methods.

Dithering by Hand:
Dithering by hand is what I tend to use most. I find that it tends to give objects a better sense of shape than dithering with the airbrush does, although it tends to just wreck your hands and take loads of time, so what you prefer is up to you. You start by blocking out colors, then blending the colors together with many tiny strokes of the pencil tool. It looks like this in the end!

Painting with the Marker Tool:
This method is newer to me, but is very exciting and produces probably the most painterly look you’re capable of getting with MS Paint! It utilizes the marker tool, which is special in that it’s semi-transparent. You block out colors in the same way that you do for other methods, but then you use the marker tool on the smallest size setting to blend them together. Because it’s semi-transparent, it will naturally produce in-between shades without you having to go out of your way to add them yourself. Once you have these in-between colors, you can color-pick those and use the marker tool with them, which produces even more middle tones! Keep color-selecting areas you’ve already used the brush on over and over, and you can get some great results!

And that’s about it! I hope this tutorial was helpful to someone. MS Paint, regardless of its age and limitations, is a fantastic and fun thing to use, and really has a feel like no other art program out there. Even though I have others available to me (especially now in the age of open-source free programs), I keep going back to it, especially when I’m feeling nostalgic. After all, for a lot of people, MS Paint was their first step into digital art!
Feel free to shoot me a message if you have any questions, or if there’s any cool tricks or techniques you know about and want to share! Thanks so much for reading! : )
No comments:
Post a Comment